
Watercolour painting is a delightful art form that allows artists of all levels to express their creativity and capture the beauty of the world around them. Whether you're a beginner artist or an experienced painter, watercolors offer endless possibilities for exploration and self-expression. In this article, we will delve into the world of watercolour painting, providing you with inspiration, techniques, and ideas to create stunning artworks.
Exploring the Magic of Watercolour Painting
Watercolor painting is renowned for its ethereal and delicate qualities. Unlike other mediums, watercolors possess a unique translucency and fluidity that creates captivating effects on paper. With just a few brushstrokes, you can create luminous washes, vibrant textures, and subtle gradients that bring your artwork to life.
Gathering the Right Art Supplies
Before diving into the world of watercolor painting, it's essential to gather the necessary art supplies. The fundamental tools include watercolor paints, watercolor brushes, watercolor paper, and a watercolor palette. You can get a non-toxic all natural watercolor it at https://shop.naturalearthpaint.ca/products/natural-watercolour-kit.
Simple Watercolor Painting Techniques
For beginners, it's helpful to start with simple watercolor painting techniques. One such technique is the wet-on-wet technique, where you apply wet paint onto a damp surface.
This technique allows colors to blend harmoniously, creating beautiful gradients and soft edges. Additionally, the wet-on-dry technique involves applying paint onto a dry surface, enabling you to achieve more precise details and crisp lines.
Easy Watercolor Ideas for Beginners
If you're a beginner artist looking for inspiration, there are numerous easy watercolor painting ideas to explore. Painting landscapes, for example, allows you to capture the beauty of nature with its rolling hills, serene lakes, and majestic mountains. You can experiment with different techniques to depict elements like trees, water, and skies, creating stunning compositions.
Unleashing Your Creativity with Abstract Watercolors
Abstract art is another exciting avenue to explore in watercolor painting. By embracing loose strokes, vibrant colors, and experimental techniques, you can create expressive and dynamic abstract watercolor paintings. Let your imagination run wild and explore the interplay of colors, shapes, and textures to create captivating and thought-provoking artworks.
Adding Fine Details to Your Watercolour Painting
While watercolor painting often relies on loose and spontaneous brushwork, incorporating fine details can enhance the overall impact of your artwork. Utilize waterproof pens or white pens to add intricate lines, highlights, and intricate patterns. These details can elevate your paintings, adding depth and visual interest to your compositions.
Step-by-Step Tutorials: Easy Watercolor Painting Projects
To guide you in your creative journey, we have prepared two step-by-step tutorials for various easy watercolor painting projects. Each tutorial will provide detailed instructions on materials, techniques, and composition, allowing you to create beautiful artworks while honing your skills in watercolour painting.
Tutorial 1: Painting a Serene Night Sky with Soft Colors and Subtle Transitions
Step 1: Gather Your Materials
-
Watercolor paints (blue, purple, black, white)
-
Watercolor brushes (round brushes of different sizes)
-
Watercolor paper
-
Water container
-
Paper towels
Step 2: Prepare Your Workspace
Find a well-lit and comfortable area to work in.
Cover your workspace with a plastic sheet or old newspaper to protect it from any accidental spills.
Step 3: Prepare Your Watercolors
Squeeze out a small amount of blue and purple paint onto your watercolor palette.
Add a touch of black paint to deepen the colors.
Mix the colors together to create a gradient from dark blue to lighter shades.
Step 4: Wet Your Watercolor Paper
Wet your watercolor paper by dipping a large brush into clean water and applying a thin, even layer of water to the entire surface of the paper.
Make sure the paper is evenly saturated, but not overly soaked.
Step 5: Apply the Base Color
Dip a medium-sized brush into the mixed blue and purple paint.
Start at the top of the paper and gently sweep the brush horizontally across the paper to create the base color for the night sky.
Gradually increase the intensity of the color towards the top, where the sky is darkest.
Step 6: Create Subtle Transitions
Rinse your brush and pick up a lighter shade of blue from the palette.
Starting from the bottom of the painted area, apply the lighter shade with gentle vertical brushstrokes, gradually blending it into the darker base color.
Continue adding lighter shades and blending them with the existing colors to create subtle transitions.
Step 7: Introduce Purple Tones
Clean your brush and switch to a smaller size.
Dip the brush into the purple paint and apply it to the lower portion of the sky, blending it with the blue tones.
Use soft, circular motions to create a gentle mix of blue and purple, adding depth and dimension to the night sky.
Step 8: Add Depth with Black
Use a small brush to add touches of black paint to the upper part of the sky, especially near the horizon line.
Gradually blend the black into the existing colors, creating a sense of depth and adding a hint of mystery to the night sky.
Step 9: Create Stars and Highlights
Clean your brush and let it dry.
Dip the tip of the brush into white paint and gently tap it over the sky to create stars.
Vary the size and intensity of the stars to add visual interest.
Use the white paint to add subtle highlights to the edges of the clouds or any other elements in the sky.
Step 10: Let it Dry
Allow your painting to dry completely before moving or framing it.
Be patient, as watercolors can take some time to dry.
Step 11: Final Touches
Once the painting is dry, evaluate it and make any necessary adjustments.
If you want to enhance certain areas or add more details, use a fine-tipped brush and transparent washes of color to achieve the desired effect.
Step 12: Display and Enjoy
Once you're satisfied with your serene night sky painting, you can frame it and proudly display it in your home or share it with others.
Admire your artistic creation and enjoy the peaceful ambiance it brings.
Tutorial 2: Painting a Colorful Hot Air Balloon Floating in a Clear Blue Sky
Step 1: Gather Your Materials
-
Watercolor paints (assorted colors)
-
Watercolor brushes (round brushes of different sizes)
-
Watercolor paper
-
Water container
-
Paper towels
Step 2: Prepare Your Workspace
Find a well-lit and comfortable area to work in.
Cover your workspace with a plastic sheet or old newspaper to protect it from any accidental spills.
Step 3: Sketch the Balloon and Basket
Use a pencil to lightly sketch the outline of the hot air balloon and its basket on the watercolor paper.
Start with a simple shape for the balloon and a rectangular shape for the basket.
Step 4: Wet Your Watercolor Paper
Wet your watercolor paper by dipping a large brush into clean water and applying a thin, even layer of water to the entire surface of the paper.
Make sure the paper is evenly saturated, but not overly soaked.
Step 5: Paint the Sky
Dip a medium-sized brush into the blue paint and start applying it to the top portion of the wet paper, where the sky will be.
Use horizontal strokes to create a smooth and even layer of blue.
Add a touch of white to the blue paint to create variations in the sky, such as clouds or a gradient effect.
Step 6: Paint the Balloon
Choose a vibrant color for the hot air balloon and dip a medium-sized brush into the paint.
Begin filling in the shape of the balloon, using broad strokes and following the pencil outline.
Leave small areas unpainted to create highlights and add dimension to the balloon.
Step 7: Add Details to the Balloon
Switch to a smaller brush and use different colors to add stripes, patterns, or designs to the balloon.
Experiment with various brushstrokes and colors to make the balloon visually appealing and lively.
Step 8: Paint the Basket
Dip a small brush into a brown or tan paint color.
Fill in the rectangular shape of the basket, adding some texture and shading to create the appearance of woven material.
Step 9: Create Shadows and Depth
Mix a darker shade of the balloon color or a complementary color to add shadows and depth to the balloon and basket.
Use a smaller brush and apply the darker color to the areas where shadows would naturally fall, such as underneath the balloon or along the sides of the basket.
Step 10: Paint the Ropes
Use a fine-tipped brush and a dark color, such as black or dark brown, to paint the ropes that connect the balloon to the basket.
Add small details and variations to make the ropes appear realistic.
Step 11: Paint the Background Elements
If desired, paint other elements in the background, such as distant hills, trees, or other hot air balloons.
Use lighter and more muted colors for the background elements to create depth and make the focal point—the colorful balloon—stand out.
Step 12: Let it Dry
Allow your painting to dry completely before moving or framing it.
Be patient, as watercolors can take some time to dry.
Step 13: Final Touches
Once the painting is dry, evaluate it and make any necessary adjustments.
Use a fine-tipped brush and transparent washes of color to refine any details or add additional highlights.
Step 14: Display and Enjoy
Once you're satisfied with your colorful hot air balloon painting, you can frame it and proudly display it in your home or share it with others.
Admire your artistic creation and enjoy the whimsical feeling of a hot air balloon floating in a clear blue sky.
Tips and Tricks for Watercolor Painting Success
As you embark on your watercolor painting journey, here are some valuable tips and tricks to enhance your skills and create stunning artworks. Experiment with different brushstrokes, layering techniques, and color mixing to discover your unique style.
Don't be afraid to make mistakes, as they often lead to unexpected and exciting results. Embrace the spontaneity and unpredictability of watercolors, allowing them to guide your artistic process.
Exploring Other Artistic Mediums: Watercolor and Acrylic Paint
While watercolors are the primary focus of this article, it's worth mentioning that you can also explore the combination of watercolors and acrylic paints. Acrylic paints offer opaque and vibrant colors, making them an excellent companion to watercolors. By combining these two mediums, you can create mixed media artworks with unique textures and visual effects.
Enhancing Your Watercolor Skills
To further develop your watercolor skills, consider attending workshops or online courses that specialize in watercolor techniques. These resources provide in-depth instruction and valuable insights from experienced artists, helping you refine your painting skills and expand your artistic horizons. Practice regularly and be patient with yourself, as mastering watercolor painting is a journey that requires dedication and perseverance.
Embracing the Joy of Watercolor Inspiration
Watercolor inspiration can be found in various forms, including nature, photographs, or even your own imagination. Take the time to observe the world around you, capturing the vibrant colors, interesting textures, and intriguing compositions that catch your eye. Allow these inspirations to fuel your creativity and guide your artistic choices as you embark on your watercolor painting projects.
Exploring Watercolor Techniques: Wet-on-Dry and Wet-on-Wet
In addition to the techniques mentioned earlier, there are two primary techniques that watercolor artists often employ: the wet-on-dry and wet-on-wet techniques. The wet-on-dry technique involves applying wet paint onto a dry surface, allowing for precise control over the paint's placement and the creation of detailed elements. On the other hand, the wet-on-wet technique involves applying wet paint onto a wet surface, enabling colors to blend and flow together, creating soft transitions and atmospheric effects.
Creating Depth and Texture in Watercolor Paintings
To add depth and texture to your watercolor painting, experiment with different brushstrokes and layering techniques. Dry brushing can create texture by dragging a relatively dry brush across the textured surface of the watercolour paper.
Splattering paint or using a toothbrush to create fine sprays of color can also add texture and visual interest to your artworks. Additionally, you can incorporate masking fluid to preserve areas of white or create crisp edges.
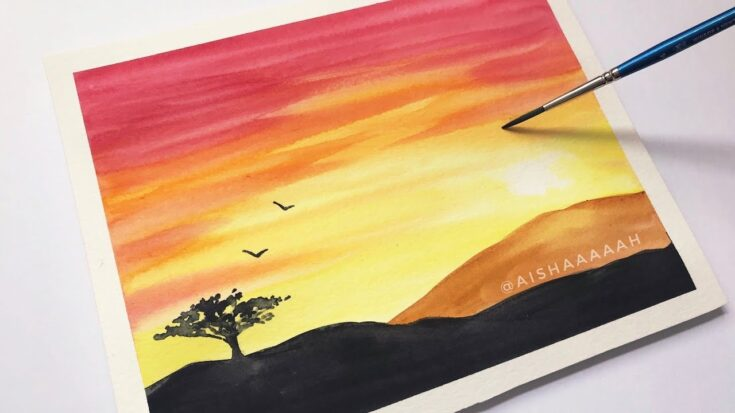
Painting Landscapes with Watercolors
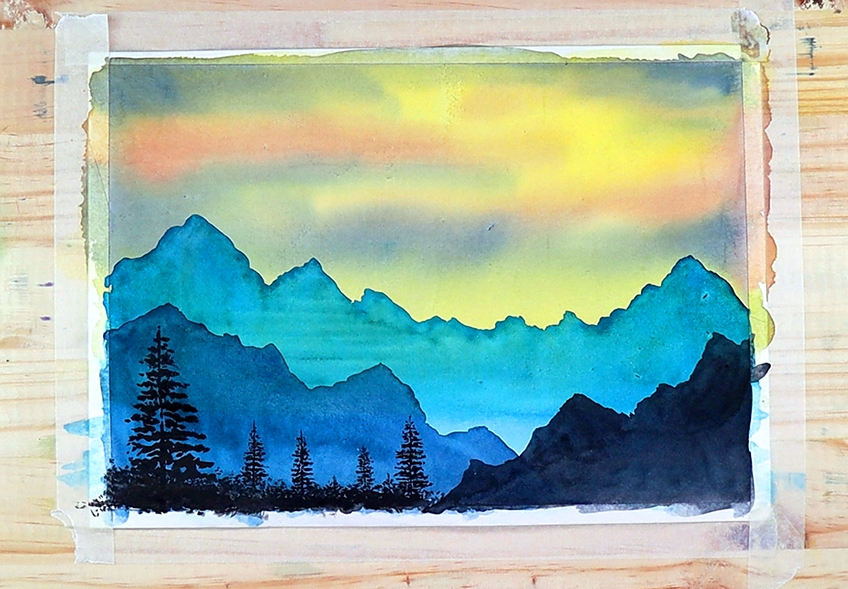
Landscape painting is a popular subject for watercolor artists. Whether you want to capture the serene beauty of a countryside or the dramatic majesty of mountains, watercolors can help you bring these landscapes to life. Experiment with different techniques to depict elements such as trees, water, clouds, and skies, adding depth, and creating a sense of atmosphere.
Exploring the Versatility of Green in Watercolor Paintings
Green is a vibrant and versatile color that plays a significant role in landscape paintings. From lush foliage to rolling meadows, green can bring life and freshness to your artwork.
Experiment with different shades and variations of green, using wet-on-wet or wet-on-dry techniques to create depth and dimension. Add touches of other colors to create more visual interest and capture the nuances of light and shadow.
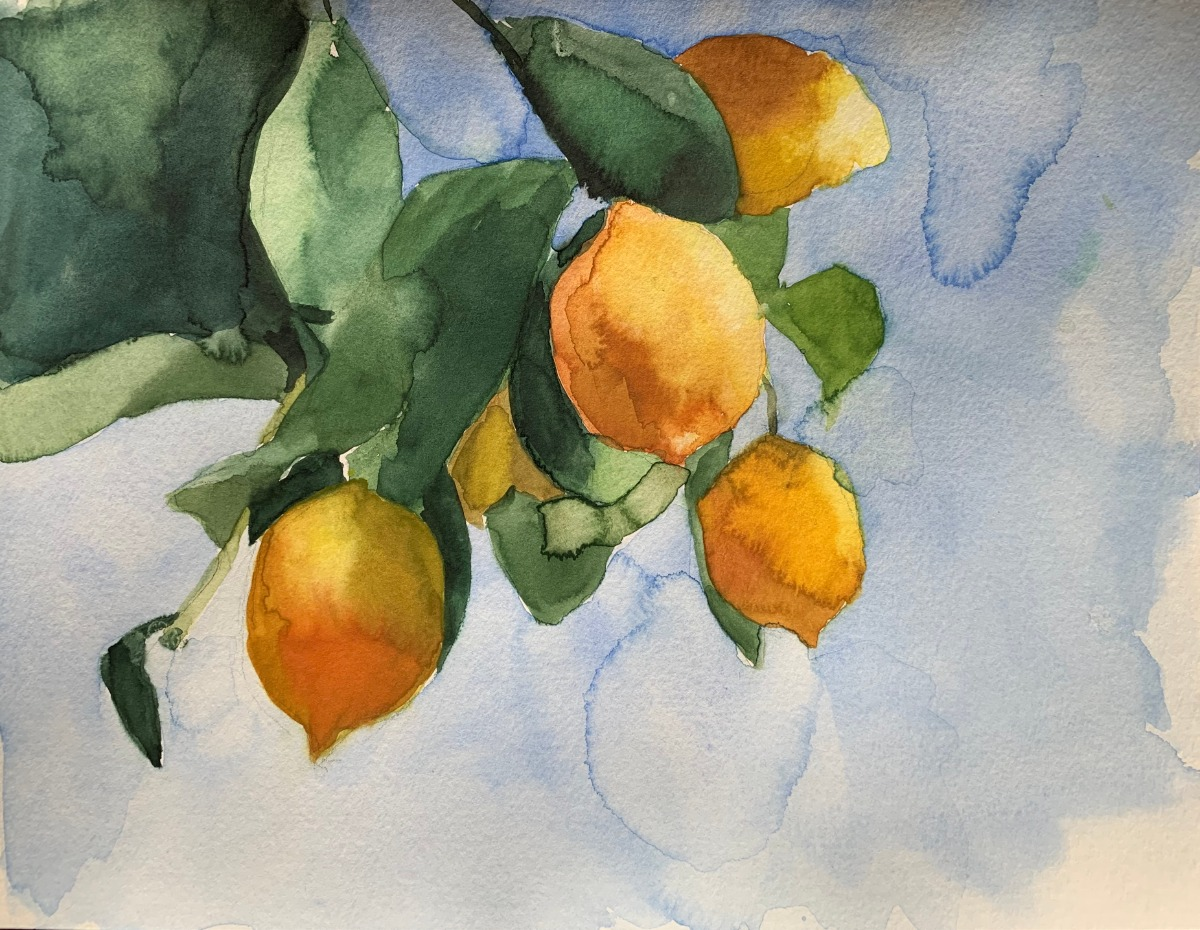
Incorporating Flowers and Floral Elements
Flowers are another popular subject in watercolor painting, allowing you to capture their delicate beauty and vibrant colors. Begin by observing the shapes, colors, and textures of various flowers, and practice drawing them to improve your drawing skills. Then, with watercolors, experiment with different techniques to create petals, leaves, and stems, using translucent washes and layered colors to achieve a realistic and captivating effect.
Mastering the Art of Painting Water
Water is a fascinating element to depict in watercolor paintings, offering opportunities to create reflections, ripples, and a sense of movement. Experiment with different techniques to capture the various qualities of water, whether it's a calm lake, a flowing river, or crashing waves. Utilize wet-on-wet techniques to create soft, fluid strokes and allow the colors to blend naturally, or use wet-on-dry techniques for more defined edges and details.
Exploring the Magic of Night Sky with Watercolors
The night sky has a captivating allure that artists often seek to capture. With watercolors, you can create a stunning celestial scene with a starry sky.
Begin by applying a dark wash as the backdrop and gradually add splatters of white or light colors to represent stars. Experiment with different techniques, such as splattering or using a toothbrush to create the illusion of stars twinkling against the dark sky. This project allows you to play with contrast and create a sense of wonder and tranquility.
Using Masking Fluid for Special Effects
Masking fluid is a valuable tool for watercolor artists as it allows you to preserve areas of the paper from being painted over. By applying masking fluid to specific areas, you can create highlights, protect intricate details, or add texture.
Once the masking fluid is dry, you can freely apply paint over it, and once the painting is complete and dry, gently rub off the masking fluid to reveal the preserved areas. This technique opens up a world of possibilities for creating intricate and detailed watercolor paintings.
Incorporating Mixed Media Elements
A watercolor painting can be enhanced by incorporating mixed media elements. For example, you can use colored pencils or markers to add details or enhance the colors in your artwork. Experiment with different mediums and explore the interplay between watercolors and other art supplies to create unique textures, effects, and visual interest.
Exploring Abstract Watercolor Paintings
Abstract art is a liberating and expressive form of watercolor painting. It allows you to break free from representing recognizable objects and instead focus on the interplay of colors, shapes, and textures.
Embrace loose brushstrokes, experiment with various techniques, and let your intuition guide you as you create abstract your watercolor painting. This genre offers endless possibilities for self-expression and encourages you to explore new artistic horizons.
Continuing Your Watercolor Journey
Watercolor painting is a continuous journey of exploration and growth. As you progress, don't be afraid to push your boundaries, experiment with new techniques, and explore different subject matters to sharpen your watercolor painting skills.
Continue learning and seeking inspiration from other artists, nature, or even everyday objects. Remember, the most important aspect of watercolor painting is to enjoy the process, embrace the happy accidents, and let your creativity flow.
Conclusion
Easy watercolor paintings offer a wonderful opportunity to unleash your creativity and express yourself artistically. With the right techniques, a sense of experimentation, and a willingness to learn, you can create abstract art and other stunning artworks that captivate and inspire.
Whether you're a beginner or an experienced artist, let watercolors be your medium of choice to explore the magic of color, light, and form. So, gather your art supplies, reflect on your watercolor painting ideas, and let your imagination run wild. Happy painting!
Frequently Asked Questions about Watercolor Painting
Q1: What is watercolor painting?
A1: Watercolor painting is a technique where pigments are mixed with water to create vibrant and translucent paintings. It is known for its fluid and transparent qualities, allowing for beautiful washes of color and delicate details.
Q2: Can anyone learn watercolor painting, even with no prior experience?
A2: Absolutely! Watercolor painting is accessible to beginners and experienced artists alike. With practice and a willingness to learn, anyone can develop their skills and create stunning watercolor artworks.
Q3: What are some easy watercolor painting ideas for beginners?
A3: Some simple watercolor painting ideas for beginners include painting open landscapes, floral arrangements, fruits, or abstract patterns. These subjects offer a great starting point to explore basic watercolor techniques and build confidence.
Q4: What are the essential art supplies needed for easy watercolor painting?
A4: The essential supplies for watercolor painting include watercolor paint, watercolour brushes, watercolour paper, a water container, and paper towels. These supplies are readily available and affordable, making watercolor one of the most accessible mediums for artists.
Q5: How can I improve my watercolor skills?
A5: To improve your watercolor skills, practice regularly and experiment with different techniques. Study the works of other watercolor artists, take classes or workshops, and learn from online tutorials. The more you paint, the more you'll develop your skills and discover your unique style.
Q6: How can I create details in my watercolor paintings?
A6: To create details in watercolor paintings, use a small brush with a pointed tip. Control the amount of water and paint on your brush and make precise, deliberate strokes. Patience and practice are key to mastering the art of fine detailing in watercolors.
Q7: What are some tips for beginners in watercolor painting?
A7: Some tips for beginners who need watercolor painting ideas include starting with simple subjects, using light washes of color to build layers, allowing time for each layer to dry before adding the next, and experimenting with different brush techniques to create various effects.